How To Use Fiber Optics
Tools and Supplies.
(First paint the INSIDE If you need to block light BEFORE you drill)
1)Pin vise or Dremel.- A small collet 3/32 is needed . I like to use the new Dremel Stylist. You can get pin vises and collets from here www.widgetsupply.com. $3.00 for the whole set.
2)Drill bits.- I use #79s for the 64 strand fiber optics. The AMT 64 strand Fiber Optics use a # 80 drill bit. I find it a little easier to use a #79.(79 is one size bigger then 80) I also get these from www.widgetsupply.com $2.00 for 10 bits
3)Fiber Optics. I use the AMT 64 strand Fiber optics. I get mine from www.thefiberopticstore.com/purchase/endglowcable.htm SECOND DOWN THE PAGE.$2.00 per foot
4)Fiber Optic Glue.- I use Super RC Z 56. You can get this at any hobby store. The glue drys clear and wont melt the fiber optics. You have to let it dry over night. $3.00
http://i5.photobucket.com/albums/y196/s ... 9-0003.jpg
You apply the glue with a tooth pick. Next to the tooth pick is a #79 drill bit.
http://i5.photobucket.com/albums/y196/s ... 9-0002.jpg
5)LEDs. I get mine from www.ebay.com or www.unique-leds.com . Most Leds run off 3 volts. However I use a 9v battery or 12v wire supply. Its easy to get LEDS to work with a 9v or 12v power supply. Just attach a 470 ohm resistor to the positive side of the LED.(LONGER SIDE) You can get resistors from radio shack or ebay. I got 1000 470ohm resistors on ebay for 7 bucks. At radio shack they are 99 cents for 6.
6)Shrink wrap ¼ inch or smaller. You get this at any car parts store. $2.00
7)Cutter. A good cutter goes a very long way. You can get a small one like mine at radio shack I got mine from harbor freight tools.$3.00
8)Wire Wrap tool. Got mine at radio shack. You use this for wrapping the 30 gauge wire around the leds and resistors makes life easy. $5.00
9)30 gauge wire. Radio Shack. $3.00
Making the Fiber Optics glow.
1)Cut a ½ inch piece of ¼ inch shrink wrap.
2)Place a 5mm( you can also use a 3mm or even 1.8 mm) LED inside one end of the shrink wrap.
3)Take one end of the 64 strand Fiber Optic cable and remove about ¼ inch for the plastic coating with a razor BE SURE NOT TO CUT THE FIBER OPTICS.
1)Put the end you just cut open of the fiber optic cable into the other side of the shrink wrap.
2)Heat with a hair dryer on low ( this depends on how hot your hair dryer gets. The small fiber optic strands will melt so start slow and on a low heat)
http://i5.photobucket.com/albums/y196/s ... C10758.jpg
http://i5.photobucket.com/albums/y196/s ... C10761.jpg
http://i5.photobucket.com/albums/y196/s ... C10762.jpg
ADDING THE FIBER OPTICS TO MODELS
(Always use more fiber optics then you think you will need!)
1)START SLOW!!- Drill a hole with the #79 drill bit. Go slow at first, the bits break easy!!! Also the resin will melt if you go to fast and make your hole a lot larger! GO SLOW. Drill from the outside of the model In. If you think you are done try to feed a strand of fiber optics into the hole. You might have to clear the hole.
2)Insert the Fiber Optics from the INSIDE to the OUTSIDE. Make sure you leave a inch or more hanging from the outside. You Leave some fiber optics hanging out, then you paint the model. After the model is all painted you will use the cutters to trim the extra fiber optics off.
3)Glue the fiber optics using the super RCZ56 glue. Use a toothpick to apply. Put the glue on the inside of the model when the strands are exiting the model. Once all the glue is on, I grab the fiber optics and pull them out about 1cm, then pull them back in 1 cm. Just to get glue all around the hole. LET DRY OVER NIGHT!!!
PLAN ON MAKING MISTAKES! START WITH A CHEAP MODEL
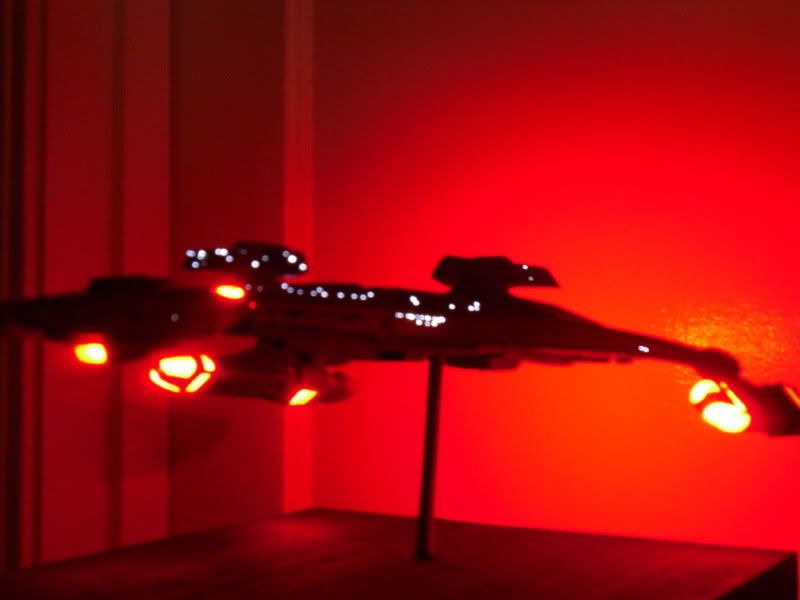
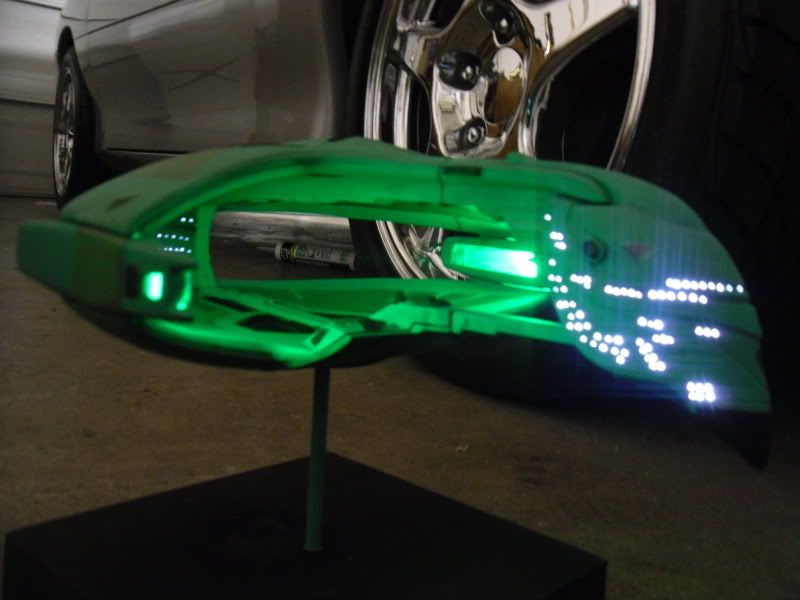
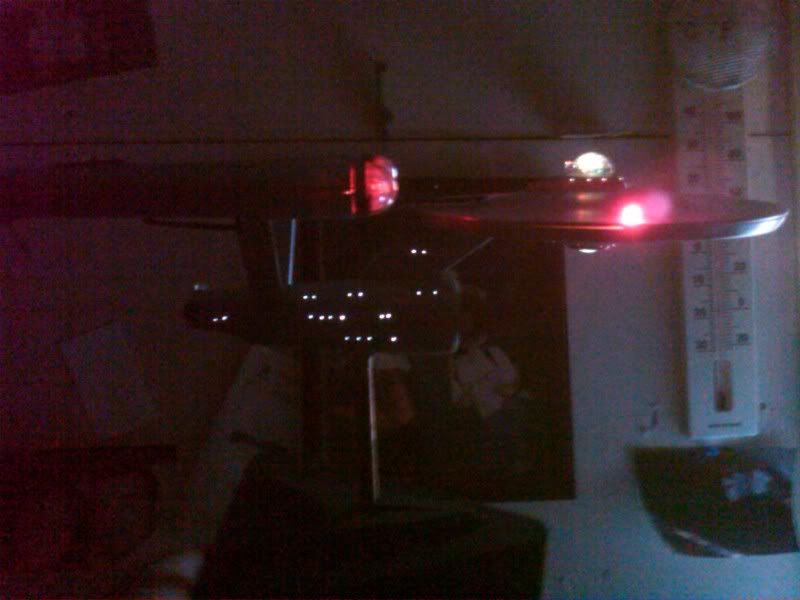
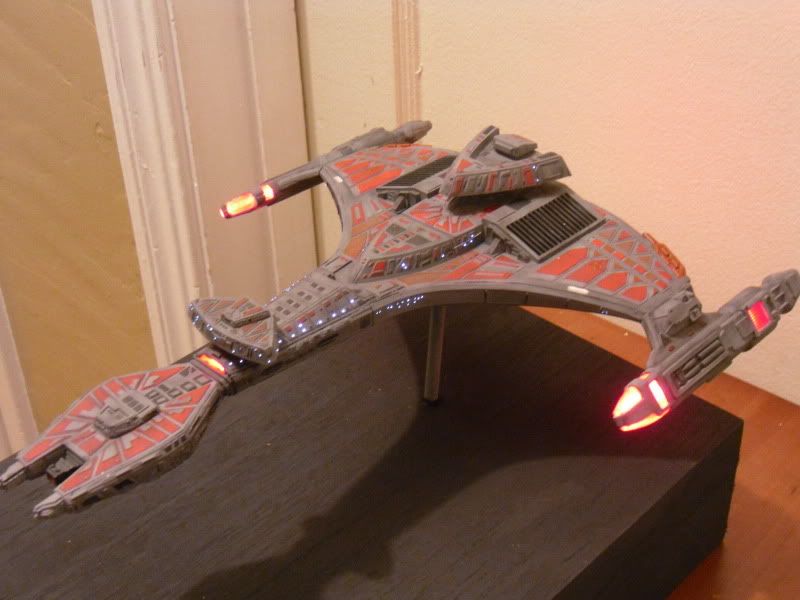
Pictures or fiber optic ships
http://i5.photobucket.com/albums/y196/s ... 2114-1.jpg
http://i5.photobucket.com/albums/y196/s ... C10782.jpg
http://i5.photobucket.com/albums/y196/s ... C10728.jpg
http://i5.photobucket.com/albums/y196/s ... C10624.jpg
http://i5.photobucket.com/albums/y196/s ... inish7.jpg
http://i5.photobucket.com/albums/y196/s ... enter1.jpg
http://i5.photobucket.com/albums/y196/s ... C10732.jpg
How To Use Fiber Optics
Moderators: Sparky, Moderators
-
Madman Lighting
- Posts: 1816
- Joined: Sat Mar 05, 2005 9:16 am
- Location: Serenity.
- Contact:
You mean kinda like this....
http://home.myfairpoint.net/johndavidcook/index.html

Nice builds by the way.
http://home.myfairpoint.net/johndavidcook/index.html
Nice builds by the way.
That Madman Who Lit Up Deep Space Nine
Lenses
Hi there,
I read somewhere (I think it was Finescale Modeler) that the tip of each fiber optic strand had to be heated in order to form a round head on top while keeping it flat against the model. The article advised to heat the tip of the strand aginst a light bulb or an incense stick and then, pull it against the model from the inside.
Using your technique, one cannot create a lens... I haven't worked with fiber optics yet but would like to have your opinion on the lens creating technique.
Thanks.
Richard
-
Sparky
- Moderator
- Posts: 2404
- Joined: Thu Jun 05, 2003 8:28 am
- Location: Are we there yet? (Chicago)
- Contact:
Please be aware of some basic ohm's law for simple circuits.
Current is cumulative in parallel hook ups and voltage is constant.
If you daisy chain (serial) LEDs (wired them plus to minus plus to minus) then voltage is cumulative and current must be equal through all the components, that is all the LEDs must be wanting the same current.
Take your total current for everything and then check the battery you will be using, 9 volt battery packs are basically AAAA's in series to cumulate to 9 volts. They don't have a lot of continuous current to give you and even less current total before they are drained down. In those cases remember that a resistor is consuming precious power and converting it to heat. It is best to design the power supply to provide the voltage the system needs and nothing extra since all extra has to be dumped as waste heat (when using resistors to control power supplied to components).
You can check out the sticky's here to see some web sites where real world load tests were done on various batteries so you know how long a setup will last before needing a new set of dilithium crystals.
<a href="http://www.kc6sye.com/2_wheresaneatpart.jpg" target="_Sparky">Is this plastic thingy on the counter a neat part?</a> <a href="http://www.kc6sye.com/1_casting_inprogress.jpg" target="_Sparky">Let's cast it.</a>
-
Madman Lighting
- Posts: 1816
- Joined: Sat Mar 05, 2005 9:16 am
- Location: Serenity.
- Contact:
Re: Lenses
A light bulb probably isnt hot enough. Get a low wattage (20 or 30 watts) soldering iron and hold the end of a fiber about 1/8" away from the hot end. Its kinda tricky, once the fiber warms up, you'll see it start to deform and round over, but once it gets hot, it will start to droop.rcad1964 wrote:Hi there,
I read somewhere (I think it was Finescale Modeler) that the tip of each fiber optic strand had to be heated in order to form a round head on top while keeping it flat against the model. The article advised to heat the tip of the strand aginst a light bulb or an incense stick and then, pull it against the model from the inside.
Using your technique, one cannot create a lens... I haven't worked with fiber optics yet but would like to have your opinion on the lens creating technique.
Thanks.
Richard
Good luck.
-John C.
That Madman Who Lit Up Deep Space Nine
Fiber Optic Lamp
I would like to do my own chandelier as the http://technabob.com/blog/2008/06/29/la ... spaghetti/
But I have no ideas how to fix the fiber together ?
Do you how to distort the fiber that it can loose it shapes? Can we Do you heat it ?
Or perhaps use a specific glue or resine ?
Thanks lot !!!
But I have no ideas how to fix the fiber together ?
Do you how to distort the fiber that it can loose it shapes? Can we Do you heat it ?
Or perhaps use a specific glue or resine ?
Thanks lot !!!
-
Glorfindel

- Posts: 1544
- Joined: Sat May 02, 2009 7:00 pm
- Location: Long Island, NY
Glueing fiber optics
Has anyone tried Gorilla glue on F.O.? I'm guessing its exactly like Crazy glue/CA.
Buck Laughlin: [after Beatrice the dog jumps up on the show judge] He went for her like she's made outta ham.
~Best in Show, 2000
~Best in Show, 2000
How do you drill the holes if the back of the model is also visible? like Star Destroyer's bridge. Do you have to drill a vertical hole from the bottom and thread the fiber down 90 degree?
Also if the surface of the model has a lot of very narrow and deep trenches, how do you cleanly cut off the extra fiber sticking out? Can anyone recommend a cutter with tip smaller than 1mm and longer than 5mm?
Also if the surface of the model has a lot of very narrow and deep trenches, how do you cleanly cut off the extra fiber sticking out? Can anyone recommend a cutter with tip smaller than 1mm and longer than 5mm?

tamasei wrote:
OR
Snip it first and pull it back into the model and them secure it... then you will need to mask each FO prior to priming and painting. Once painted... you pick off the mask with a tooth pick.
Carefully, using either a brand new razer blade or a brand new #11 exacto blade... being carefull not to nice or dig into the surface of your model.Also if the surface of the model has a lot of very narrow and deep trenches, how do you cleanly cut off the extra fiber sticking out?
OR
Snip it first and pull it back into the model and them secure it... then you will need to mask each FO prior to priming and painting. Once painted... you pick off the mask with a tooth pick.
"Things fall apart... It's Scientific" Talking Heads
-
Major Focker
- Posts: 123
- Joined: Thu Oct 04, 2007 10:05 pm
-
Madman Lighting
- Posts: 1816
- Joined: Sat Mar 05, 2005 9:16 am
- Location: Serenity.
- Contact:
I dont recommend painting first then inserting FO.
First, the holes are pretty small to start with, and the paint will tend to plug em up. Then what?
I suppose you could paint, then drill and insert, then fully assemble. Depends on the subject.
I like to do all the assembly and FO insertion first, the paint. The paint fills in any tiny cracks around the FO and makes em look like they've always been there.
That Madman Who Lit Up Deep Space Nine
-
captain talon
- Posts: 3
- Joined: Fri Jun 10, 2011 4:37 am
Can you use fiber optics on this?
http://4.bp.blogspot.com/-16-rNNK48zE/T ... arian1.jpg
I've seen someone drill the eyes out and light them up, using Leds and small batteries. This figure is 28mm tall. I'd love to light up the eyes, or create some kind of lighting effect from the hand....
Can this be done?
I've seen someone drill the eyes out and light them up, using Leds and small batteries. This figure is 28mm tall. I'd love to light up the eyes, or create some kind of lighting effect from the hand....
Can this be done?
-
severedblue
- Posts: 30
- Joined: Tue Dec 28, 2010 8:52 pm
- Location: Melbourne, Australia
I am really excited... I just got my electronics to put fibre into my grav tanks.
As some trying to do Eldar, I can identify with the last poster's question.
You'd have to pray it's a plastic kit (or Finecast now, yay!) and NOT metal
saw it in half, drill it out and install the electronics. You'll need a dremel
Then... greenstuff it back together to hide the saw marks.. or (illegal, mind you) create a mold and recast it so that you can put it in two halves as another idea.
There was a photo on the Dakka forums of a guy putting Green LEDs into monstorous creatures (e.g. carnifex) He did manage to put it into a Night Bringer but he butchered the model. Only judicious use of sculpting and greenstuff will save you.
At least the circuits for those minis are very simple!
-
captain talon
- Posts: 3
- Joined: Fri Jun 10, 2011 4:37 am
The guy who did it for his Thousand Suns used metal figures!severedblue wrote:I am really excited... I just got my electronics to put fibre into my grav tanks.
As some trying to do Eldar, I can identify with the last poster's question.
You'd have to pray it's a plastic kit (or Finecast now, yay!) and NOT metal
saw it in half, drill it out and install the electronics. You'll need a dremel
Then... greenstuff it back together to hide the saw marks.. or (illegal, mind you) create a mold and recast it so that you can put it in two halves as another idea.
There was a photo on the Dakka forums of a guy putting Green LEDs into monstorous creatures (e.g. carnifex) He did manage to put it into a Night Bringer but he butchered the model. Only judicious use of sculpting and greenstuff will save you.
At least the circuits for those minis are very simple!
-
severedblue
- Posts: 30
- Joined: Tue Dec 28, 2010 8:52 pm
- Location: Melbourne, Australia
You'll have to be very patient then. I watched a green stuff master saw a metal model once and it is very tedious... I avoid converting metal models like the plague. As I said, maybe it is worthwhile waiting for your model to come out in Finecast which will be easier to saw / mod.
To give you an idea, what takes one minute to hand drill in plastic takes six minutes to drill in metal.
What would be instructive is to see the "before" paint job and see how much green stuff the modeller used to create his model, and how much sculpting skill that would require.
I saw photos on Dakkadakka of a drilled out Night Bringer which had a green LED installed under the hood. Anything is possible, the question is how much time do you have and how patient are you... or are you willing to pay someone to do it for you...
captain talon wrote:The guy who did it for his Thousand Suns used metal figures!severedblue wrote:I am really excited... I just got my electronics to put fibre into my grav tanks.
As some trying to do Eldar, I can identify with the last poster's question.
You'd have to pray it's a plastic kit (or Finecast now, yay!) and NOT metal
saw it in half, drill it out and install the electronics. You'll need a dremel
Then... greenstuff it back together to hide the saw marks.. or (illegal, mind you) create a mold and recast it so that you can put it in two halves as another idea.
There was a photo on the Dakka forums of a guy putting Green LEDs into monstorous creatures (e.g. carnifex) He did manage to put it into a Night Bringer but he butchered the model. Only judicious use of sculpting and greenstuff will save you.
At least the circuits for those minis are very simple!
-
ethanehunt
- Posts: 1
- Joined: Thu Oct 20, 2011 3:11 am
- Contact:
You could actually make another (false) ceiling right under the ceiling that you have now.This could be made out of drywall OR make a frame then you some kind of panelling that you choose. it would just lower the ceiling by an inch. just would have to do it low enough not to kink or bend the fiberoptic cable. The light box would have to be small enough for you to fit in your Actual ceiling you have now. you could cut a hole in your ceiling to fit that in between the ceiling joist. if you ever wanted to take it down you could patch it back with dry wall. Home Depot or who ever you have near by sells access panels to put in drywall. you could do that for your light box so you could access it if you need to then paint it black I do make some light boxes and could do one for you if you wanted. I sell them way cheaper than they are sold online for the price. they are home made but I would guarentee my work. hope this helps