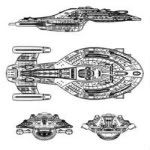
This is a review for the Trekmodeller 1/350 Refit lighting set.
The kit I ordered was the pre-built one, as I have absolutely zero experience of electronics.
http://www.trekmodeler.com/services/lig ... refit1.htm
Price $279, six weeks required for construction.
Features:
Digital Instruction Manual, Step by Step, Fully illustrated and with full-color photos.
Fading Light Effects.
Warp Mode.
Stand-By Mode.
Full Interior Lighting, including Botanical Gardens, Cargo/Shuttle Bay, and VIP Lounge.
Working Navigation and Running Lights.
Pre-Wired Display Base Electronics
The kit was very well packaged, with each sub-section mounted on its own board. All boards are fully annotated (as to what goes where), and all the connectors are colour coded for ease of execution.
The kit is designed to be tested right out of the box. Sure enough, every single light was found to be in perfect working order.
Initially, this kit looks a bit expensive. However, once obtained you will realise that every cent is well spent.
It is extremely well produced, and to a very high quality.
All in all I would have no hesitaition in recommending this product to fellow modellers.
Pro's: Easy to install, pre-fabricated. Clear and detailed instruction manual.
Con's: Six weeks build time (this wasn't a problem for me, as I spent the time prepping the kit, but some may find the delay excessive)
Quality: (for a 'garage' kit): 9/10
Value for money: 9/10
Overall: (not an aggregate): 9/10
Review: Trekmodeller 1/350 Refit Lighting Set
Moderators: Sparky, Moderators
-
generalFROSTY
- Posts: 112
- Joined: Mon Apr 19, 2010 11:08 pm
- Location: Lancaster, PA
I just got mine a few days ago.
I had the instruction manual printed out in full color and binded for reference during my build - but unfortunately, I am a month or two away from even beginning to work with the lights!
I am really taking my time to build this kit one piece at a time, and the modifications required as per the light kit instructions will have me VERY carefully reading and re-reading and re-reading all the details regarding the modifications.
Absolutely worth the money - especially for those - like myself - who know absolutely nothing about electronics.
Agreed, VERY well packaged AND marked.
This kit will really make the kit pop and I look forward to seeing 'what she's got'

-
Delorean Man

- Posts: 377
- Joined: Mon Jan 18, 2010 10:43 pm
hi i got mt trekmodeler light kit about 2 weeks ago, and just got my powerstream power supply,
let me tell you that this kit is a work of art in its own right,
i am very happy with what i see, i ordered a runway sequencing light kit from bakatronics.com part #fk115w that i will be incorporating into this build, i emailed trekmodeler in regards to where to splice this into the kit.
they responded with a schematic as to where to add it in
these people really are top notch
as for the kit i think it is very worth the price on these levels.
first off all of the thinking, research, and the like has already been done for you, just planning out and excecuting this would take months of trial and error,
trying to figure out how to make the formation lights,the rcs thruster lights,
deflector dish, warp fade, standby mode ect all work is another hurdle
i think that the research/trial and errorthat was was made by trekmodeler
and the price he asks is small penance for the kit
i have a decent electrical background, however just building this would alone consume several months just in building the kit lighting
overall it is money well spent
my hat goes off to delorean man/ aka helipilot27 from youtube for the inspiration for the build i am about to endeavor into
-
Delorean Man
- Posts: 377
- Joined: Mon Jan 18, 2010 10:43 pm
Hey helioDelorean Man wrote:A picture is worth a thousand words...so heres a video:
http://www.youtube.com/watch?v=xhVB1rdn ... re=related
I downloaded everyone one of your videos. You did a SUPER MARVELOUS JOB and also one of the best Tutorials I have ever seen. I haven't modeled since I was 15 and back then, we used bondo for filler. So, your the one responsible for getting me back into this. Hehehe.
The light kit is good but the amount of wires can be reduced by using a bus system and with the hollow rod, I don't see why I should put the ckt cards in the model at all. I going to take a look at it and if I decide to mod it, I'll put the mods up here on the board.
Did you use the backbone support that Tech Modelers is selling to keep the ship from drooping? I read the web page where they got the design from and it's a good idea to use the backbone for a bus or a ground system. Would save on lots of wires.
Well, hope to see more of your stuff.. Right now, I am investigating primers and light masking.
-
Delorean Man
- Posts: 377
- Joined: Mon Jan 18, 2010 10:43 pm
Delorean Man wrote: I remember when building mine, the saucer(with electronics and many coats of light blocking primer) weighed in around 2 lbs. I could not believe the neck would support it, but it easily does.
That's another thing about the Round2 version, there is only one mount. They did away with those hideous clear saucer supports that were prone to breaking and allowing your refit to fall on the floor. The new release, has just the one mount and it makes for such a clean and unobstructed model.
2 lbs, that's surprising, really heavy. Was the light blocking primer inside mostly or outside?
I was going to buy the model from another source but I don't know if they will send me the old model and not the latest version, so thanks, I will definitely get it from Round 2.
One thing I didn't like about the Trekmodelers Lighting kit was the 2 LED's for the Deflector. I saw another guys build where he has a 5mm LED at dead center painted blue and 4ea 3mm LED's surrounding the center LED which are painted reddish to match the movie. I think i will go with that approach. It keeps things more centered.
Concerning the Deflector's transparent Dish, did you scuff it to diffuse it and make it Opaque? I am thinking of doing that along with some liquid diffusing solution I have seen for sale?
Thanks for the Info, I'll probably pump you for more, hope you don't mind.
-
Delorean Man
- Posts: 377
- Joined: Mon Jan 18, 2010 10:43 pm
I'm not worried about the electronics, I'm a EE so, a little diode doesn't bother me. I was thinking of making my own lighting system but no point in it if 1 exists. I don't particularly like the non warp color. I'll probably mod the heck out of it, anyway. The dish had me thinking some.Thanks for the info. The painting is my real problem, I was never a good painter.Delorean Man wrote:I would ask Trekmodeler before doing any extensive mods on the light kit. If something goes wrong after you have it assembled, then you're out of luck.
If you diffuse the dish correctly, you only need 2 leds to illuminate it correctly. The 2 lights seem to work well you dont paint them they are already the right colors, the instructions will tell you how to diffuse the transparent parts(frosted glass spray), but I sanded mine on both sides before hand as well. The outer side of the clear parts got sprayed with the same semi-gloss clear as the rest of the model which seems to remove that "model kit" look from them and makes them appear more realistic.
I really cant remember the exact weight of the saucer, but it was between 1.5 and 2 lbs. light blocking was on both sides. 2 coats of black primer, 2 coats of white primer, same on outside, followed by the paint, pearl coats, clear, it adds up.
[quote="Delorean Man"]
Hey guy
Go and look at this build.. Talk about oppressive/compulsive detailing.
http://showcase.netins.net/web/marc111c ... _WIP_1.htm
You will notice where the backbone idea comes from.
Hey guy
Go and look at this build.. Talk about oppressive/compulsive detailing.
http://showcase.netins.net/web/marc111c ... _WIP_1.htm
You will notice where the backbone idea comes from.
-
Delorean Man
- Posts: 377
- Joined: Mon Jan 18, 2010 10:43 pm
I forgot to ask about the Fiber Optics. Were the Fiber Optic Lines you used glass or plastic? The Lines I have seen for hobby use all seem to be plastic, where-as real Fiber Optic Lines are glass.Delorean Man wrote:I saw that site last year, it was one of the reasons I decided to build mine. If you are going to support it from the side, then yes you will need a skeleton, but it's just not needed for traditional bottom mounting.
A lot of people get carried away with super-detailing, only to loose interest later and the project shelved. I set a timetable with a deadline keeping the detailing to a reasonable level.
Right now I'm planning a millennium falcon cut-away model fully lit or course, but i'm holding off thinking the Reliant or the Enterprise b will soon be avalaible.
I don't have room for lots of models, but one really good one, I have a nice spot just waiting for it. Right below my last decoration I hung on a wall, authentic roman gladius. It's a nice statement, the ancient world and the future world. A nice support from the bottom is good, having things hanging all over the place just collects dust. As far as spaceships go, the Reliant is a better designed spacecraft. I always preferred that design vice the long pylons and long neck of the Enterprise. Then again all the Star Trek ships would make terrible warships, they look good though and that's what they was supposed to do. I've been going thru the plans of the Yamato & Iowa Class WWII Battleships and these are some awesomely designed gun platforms. If I make another model, probably be the Iowa class.
-
Thomas E. Johnson
- Posts: 2821
- Joined: Fri Jan 23, 2004 10:56 pm
- Location: Up The Street From Uncle Sam's House
Thanks Bruce, is that one of the multivoltage transformers that have a variety of different connectors?z1pkicker wrote:Hey mate,
I got my power supply from JayCar - cost around $30.00 from memory, Dick Smith ought to have them as well.
Cheers,
Bruce
I was just not sure of the connection as the pics dont show the actual base connector
-
Thomas E. Johnson
- Posts: 2821
- Joined: Fri Jan 23, 2004 10:56 pm
- Location: Up The Street From Uncle Sam's House
Nope, it was specifically rated for the voltage but it did have a lot of different connections that came with it.Matty1973 wrote:Thanks Bruce, is that one of the multivoltage transformers that have a variety of different connectors?z1pkicker wrote:Hey mate,
I got my power supply from JayCar - cost around $30.00 from memory, Dick Smith ought to have them as well.
Cheers,
Bruce
I was just not sure of the connection as the pics dont show the actual base connector

Hi all
New to the forum doing what every one else is or has been doing since it comes to building this large scale model to detail ( Research and reading heaps )
I'll do the same, do my best to what I know I can do.
I purchase the USS Enterprise NCC-1701 1/350 by Polar Lights a couple of weeks ago from the USA and I'm planing on ordering from Trekmodeler next week as well
thanks for the links and positive input about the Trekmodeler, I also will ask for the Adobe PDF of the instructions once paid for.
I understand from his web site there is a delay in shipping due to orders correct ?
O yer didn't think this model would cost me so much, I'm still in the shopping list mode,
got a site that's on its way got a few more things to do to it then I'll post a link,
before I found this forum I had download, videos, images and manuals and whacked it all up on a wordpress website on my local server here at home to try get a heads up to what I'm gotta be spending months on,
easier and faster loading the site locally and not across the net cuz this town is bad for Lighting and power outs, LOL, think I've walk into mess but its gonna be fun.
cheers karl
I ordered my 2nd kit on the 12th of July, and they shipped it on the 30th of august, they are really busy at the moment but keep you updated.
As you mentioned they will send you the PDF once payed so you can start the prep work and work on the mini kits while waiting.
Mine arrived yesterday so it's play time
As you mentioned they will send you the PDF once payed so you can start the prep work and work on the mini kits while waiting.
Mine arrived yesterday so it's play time
Check out my Borg Enhanced Voyager
http://www.youtube.com/watch?v=rKaMTm4Lvmk
http://www.youtube.com/watch?v=rKaMTm4Lvmk
Awsome Matty, just watched your video, good to see a Perth person in the forum, I'm about 2 hours away.Matty1973 wrote:I ordered my 2nd kit on the 12th of July, and they shipped it on the 30th of august, they are really busy at the moment but keep you updated.
As you mentioned they will send you the PDF once payed so you can start the prep work and work on the mini kits while waiting.
Mine arrived yesterday so it's play time
Here's the link to the site, still trying to work out why my tops links are not pointing to the right URL, if I change the theme to default the top links are OK, if I swap to the LCARS theme the tops links goes back to my main site I built when I was living in Rocko.
http://www.rockinghamgateway.com/~startrek/
You might want to ask them to mod the cable coming out of the secondary hull to be 4 inches longer, I built the secondary hull up and want to put on the neck and fill and sand it, but the stock build the cable just pokes out of the hull and there's no way I can get my fat fingers down to join the 2 after doing the build my waykarlfk wrote:Ordered the TME-RLK0001-1/350 Refit Enterprise Pre-Built Lighting kit today for the USS ENTERPRISE NCC 1701 A 1/350 last night
did ask for the PDF file, 1st email arrived saying it was attached but it wasn't in the email so I'm waiting for him to email me back
K
Check out my Borg Enhanced Voyager
http://www.youtube.com/watch?v=rKaMTm4Lvmk
http://www.youtube.com/watch?v=rKaMTm4Lvmk
cheers I have email trekmodeler and asked him about it, will let you know what he says, cuz I ask him if there was a tip on how to join cable.You might want to ask them to mod the cable coming out of the secondary hull to be 4 inches longer, I built the secondary hull up and want to put on the neck and fill and sand it, but the stock build the cable just pokes out of the hull and there's no way I can get my fat fingers down to join the 2 after doing the build my way
karl
Matty1973, you ordered a kit on the 12th of July and you had it before September? I ordered mine on the 18th of July. It's almost October and I haven't seen it yet. When I emailed them on Sept 4 they said two more weeks and it still hasn't arrived three weeks later.
I don't understand how 6 days of separation between our orders translates into a month + later.
Time to email again.
I don't understand how 6 days of separation between our orders translates into a month + later.
Time to email again.